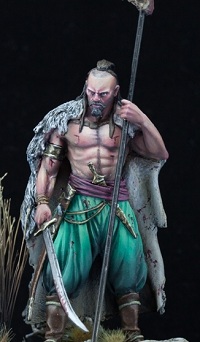
Aujourd'hui je vous présente ma dernière figurine: Pippo de chez Aradia Miniatures! Une pièce dont le concept est de Stefano Moroni et la sculpture d'Allan Carrasco très agréable à peindre! Today I present you my latest figurine: Pippo from Aradia Miniatures! A piece whose concept is by Stefano Moroni and the sculpture by Allan Carrasco very pleasant to paint!
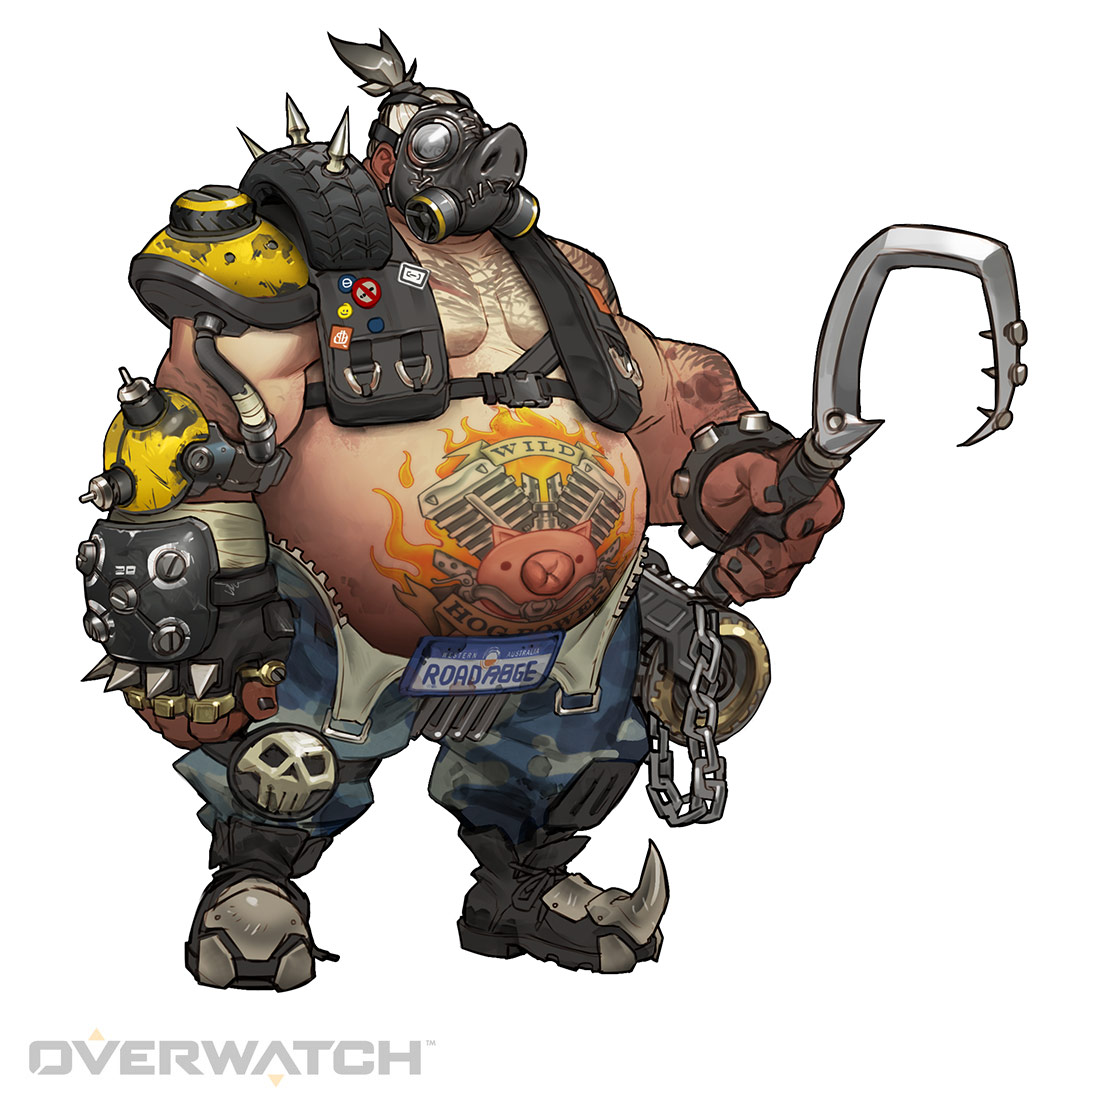
Son allure d'homme-porc m'a fait pensé au personnage de Chopper dans le jeu-vidéo Overwatch, équipé d'un crochet de boucher accroché à son poignet par une chaine, qui lui sert à agripper ses adversaires. His pig-man look made me think of Roadhogg's character in the Overwatch video game, equipped with a butcher's hook attached to his wrist by a chain, which he uses to grab his opponents.
Je me suis donc inspiré de lui pour transformer mon Pippo! Je lui ai donc créé un crochet avec de la carte plastique, et ajouté une chaine immobilisée avec de la colle PVA. So I was inspired by him to transform my Pippo! So I created a hook for him with plastic card, and added a chain immobilized with PVA glue.
En guise de victime, j'ai trouvé un tentacule qui trainait dans ma boite à rabiots, cela fera très bien l'affaire!
As a victim, I found a tentacle lying in my bits stock, it will do very well!
Une fois la peinture terminée, il me restait à couler un petit peu de résine pour accentuer l'ambiance de bord de mer, un petit coffrage avec de la carte plastique transparente collée à la colle à bois et retenu avec des élastiques est donc créé.
Once the painting was finished, I still had to pour a little bit of resin to accentuate the seaside atmosphere, so a small formwork with transparent plastic card glued to the wood glue and held with rubber bands was created.
Pour les coulures dégoulinantes du tentacule, j'ai utilisé la résine de glaçage Gédéo (la même que pour le crâne de xénomorphe utilisé pour ma seynète Alien) que j'ai étirée avec un cure-dent au bout de quelques heures de séchage. Si la résine est encore trop liquide, les coulures se résorberont, donc c'est une manipulation à surveiller.
For the dripping drips of the tentacle, I used the Gédéo icing resin (the same as for the xenomorph skull used for my Alien seynet) that I stretched with a toothpick after a few hours of drying. If the resin is still too liquid, the drips will disappear, so it is a handling to be watched.
Et voilà, Pippo est prêt à chasser le poulpe géant!
And here we are, Pippo is ready to hunt some giant octopus!
Un article rapide pour vous donner mes schémas de couleurs pour 3 figurines Joan Of Arc de Mythic Games. A quick article to give you my color schemes for 3 Joan of Arc minis from Mythic Games.
Bonjour et bienvenue à bord du Nostromo, là où personne ne vous entendra crier! Nous en sommes en 2019, 40 ans après la sortie du chef d'œuvre de Science Fiction de Ridley Scott...
Vous l'aurez compris, cet article va parler de la conception de mon diorama Alien!
Welcome aboard the Nostromo, where nobody will hear you scream!
We are in 2019, 40 years after Ridley Scott's Sci-Fi master Piece...
You got it, this article will talk about the design of my Alien diorama!
La conception
Dès le départ, j'ai eu envie de créer un diorama claustrophobique, avec un éclairage par leds pour en accentuer l'ambiance.
Ces choix là amènent donc plusieurs contraintes:
-Un décor très fermé avec beaucoup de recoins est très difficile à peindre, donc il faut qu'il soit en plusieurs parties à assembler.
-Un éclairage leds nécessite un décor creux pour pouvoir y placer l'installation électrique (diodes, fils, pile...).
J'ai donc modélisé 70% du décor en 3D, afin de le faire imprimer, la partie restante étant réalisée en scratchbuild.
De petits aimants seront placés dans des trous prévus à cet effet, afin de pouvoir garder l'ensemble fermé.
Design
At the begining, i wanted to creat a claustrophobic diorama, with a led lighting to accentuate the atmosphere.
Thos choices brings some problems:
-A close decor is hard to paint, so i need several pieces to assemble.
-A led lighting needs an empty decor to put the electrical installation (battery, wires, leds).
So i 3D models 70% of the decor for a 3D printing. The rest is scratchbuild.
Little magnets will be put in holes designed for that, in order to keep the whole closed.
Modélisation 3D du décor - 3D modeling of the decor
Le décor une fois imprimé - 3D print decor
La partie en scratchbuild du décor - Scratchbuilding of a part of the decor
Les pièces après sous-couche - Basecoat pieces
La peinture
Malgré la présence de leds, j'ai tout de même voulu créer une ambiance lumineuse par la peinture, pour faire en sorte que le diorama fonctionne éteint ou dans une pièce très éclairée.
J'ai donc travaillé deux OSL, un orange simplement peint à l'aérographe, et un vert un peu plus détaillé.
Pour celui-ci, j'ai d'abord travaillé les tons en noir et blanc, sur lequel j'ai passé un voile vert à l'aérographe. Les zones les plus blanches deviennent donc vert intense.
The painting
Despite the leds, i wanted to create a light atmosphere by painting to make sure that the diorama works off or in a bright room.
So i worked two OSL, an orange simply painted with an airbrush, and a green one more detailed.
For this one, i first worked the black and white tones, on which i passed a green veil with the airbrush. The whitest areas become intense green.
Autre point qui me tenait à cœur, c'était de retranscrire la transparence du crâne du xenomorphe, comme dans le premier film Alien.
Another point that was important to me was to transcribe the transparency of the xenomorph skull, as in the first Alien Movie.
Pour cela j'ai utilisé une résine de glaçage, qui s'utilise comme la résine cristal, mais en plus épais. Une fois le mélange fait j'ai donc laissé un petit peu durcir la résine avant de l'appliquer minutieusement sur le crâne peint.
For that i used some glazing resin, thicker than the resin cristal. Once the mixture is done i let a little harden before applying it thoroughly on the painted skull.
L'alien en cours de peinture - The alien during the painting
L'alien après l'application de la résine - The alien after the resin
Après 5 mois de travail, voici les photos du diorama!
After 5 months of work, here is the diorama pictures!